
Plasterers are hard to find because this trade is in high demand. Add to that a shortage of construction materials , which has hit plaster hard, and a shortage due to soaring workloads and loss of workers because of Brexit, and it becomes difficult for a plasterer to find a qualified tradesperson.
This means that you might have to wait up to two months before you find a plasterer willing to do your job. However, speed is important in order to get a plasterer on board quickly so as not to delay your project. You also need to make sure you hire someone who can deliver a high-quality finish.
These tips will help you find a plasterer and provide a guideline for the finishing of your rooms.
How to find a good plasterer
It has never been easy to find plasterers. You will also see larger companies with logos on their vans. However, they may not always be willing to take on single dwellings. Their overheads would likely make it prohibitive for them to charge a reasonable price.
Asking other tradespeople who have worked on your project can help you find a competent plasterer. The plasterer is a trade that is needed later in the project, so you have plenty of time for your research.
You can also find information on tradesmen in your area through various websites. You can ask for recommendations from fellow self-builders or renovators. This will allow you to view their past work and make an assessment of how they are.
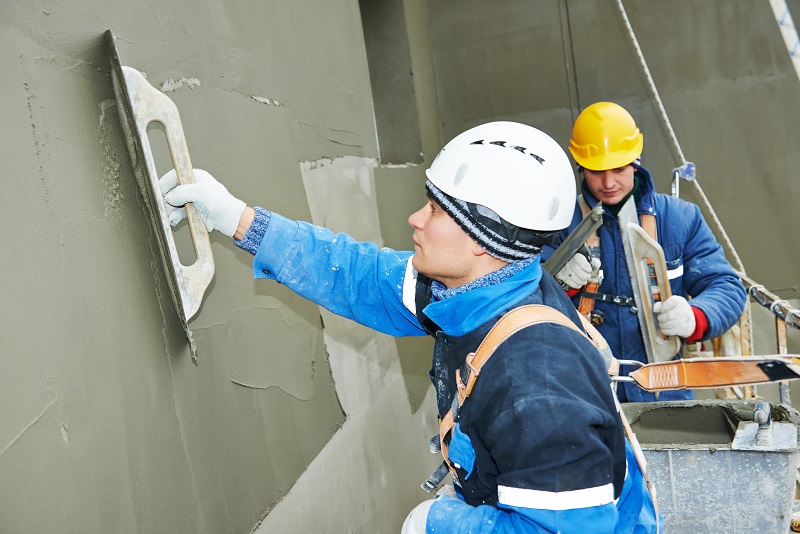
What does good plastering look like?
Here are some things to watch out for when assessing plastering quality.
1. When walling, be aware of trowel marks and rough patches. Good decorators will almost always have tried to eliminate any imperfections. However, if you look closely at the wall in good light, you’ll see undulations.
2. Drylining undulations can be very apparent if the boards have not been sanded but have had their joints taped and filled.
3. Be aware of excessive cracking and crazing.
4. Cracking at the junction between the ceiling and walling could indicate that they haven’t properly taped the joints. This situation is not suitable for paper-based tapes. A mesh scrim tape would be a better choice.
5. The day prior to skimming begins is a good time to pay attention. This is when labourers might have been sent in earlier in order tape all corners and joints. Be aware of any tape/scrim sticking to the boards. Plasterers in a hurry will often just pull the tape off and throw it away.
6. To feel the smoothness of freshly uncoated plaster, rub your back against it. Do not use your palm to rub the plaster as grease can build up.
What is the Average Cost of a Good Plasterer?
Plasterers in wellington are scarce, so they can charge a premium for their services. Plasterers in many areas can expect to make between PS150-PS200 per person per day. Plasterers often work alongside a labourer who will charge an additional PS100-PS120 per day.
On average, a new build will take a gang between two and three weeks from start to finish. Like other trades, the mark a good plasterer has is their confidence in their ability. They will be able charge for the time they require in a lump sum and less likely to charge by the hour.
What are the Essentials of Providing a Plasterer with?
A plastering “gang” usually consists of one or two plasterers and a labourer to mix and maintain the plaster.
Although renderers and plasterers might have their own mixer for sand or cement, they will most likely be able to use one on-site.
Dry liners and plasterers will own their own trugs or containers for mixing materials. They can use a hand-held power drill with an attachment to mix the materials. External and internal scaffolding might be required. A plasterer will always require a trestle to place their spot boards.
They will need drywall screws, scrim, paper tape, plasterboard, and any other beading or stops, as well as bagged plastering materials.
What does a plasterer do?
Plasterer is a term that encompasses many different trades. Understanding the sub-trades is important.
The traditional plasterer was responsible for applying a smooth or texture finish to external and internal walls. He also turned rough brickwork and stonework into walls that could be used as a dwelling. While this is still a part of their work, the popularity of what is now called hard plastering on the interior is declining.
An internal hard plaster is a wall that has been coated with sand cement render, proprietary base plaster, and then topped with a thin layer of smooth finishing plaster.
Proponents love it because it provides walls with a dense feel and density. It is also a great choice for homes that require superior airtightness. This is a highly skilled job that requires special care if you want it to work.
Plasterers must know when to apply each coat. Too soon and the plaster will crack as the substrate dries. Too late, and the finish may not find the key and separate from the substrate.
External plastering, also known as rendering follows the two-coat principle. It usually uses sand and cement. A specialist company will normally handle this task if you plan to use proprietary products.
Image credit: getty Images
Hard plaster can’t be used in a timber frame structure. This is why drylining was created. Plasterboard sheets are attached to the walling holes and then finished with plaster coating or taped at the joints. These sheets are then smoothed with jointing compound or plaster.
Drylining a masonry structure is slightly different because there are no studs on which to attach the boards. Although many builders used a battening system for carrying the boards when it first came out, this was time-consuming and required the addition of a carpenter trade. The current method of attaching the boards to the walls with adhesive (known as “dot and dau”) was developed quickly.
Tackers and dry liners can be used as one or two operatives. They will mix a batch of adhesive, then cut the boards and’slap it’ them on masonry walls. They will attach the boards to the timber studs on studwork walls.
The finishing of the boards would be left to the plasterer and a tacker wouldn’t normally do it. After the boards are fixed, dry liners may be responsible for taping and finishing them.
The tradesperson no longer uses nails or clouts. Instead, the boards are attached using drywall screws. These screws preserve the board’s integrity and prevent any ‘popping’ later.