
These nine steps are explained in plain English. It takes you just five minutes to learn how to braid the right way from our experts.
How to braid a money tree
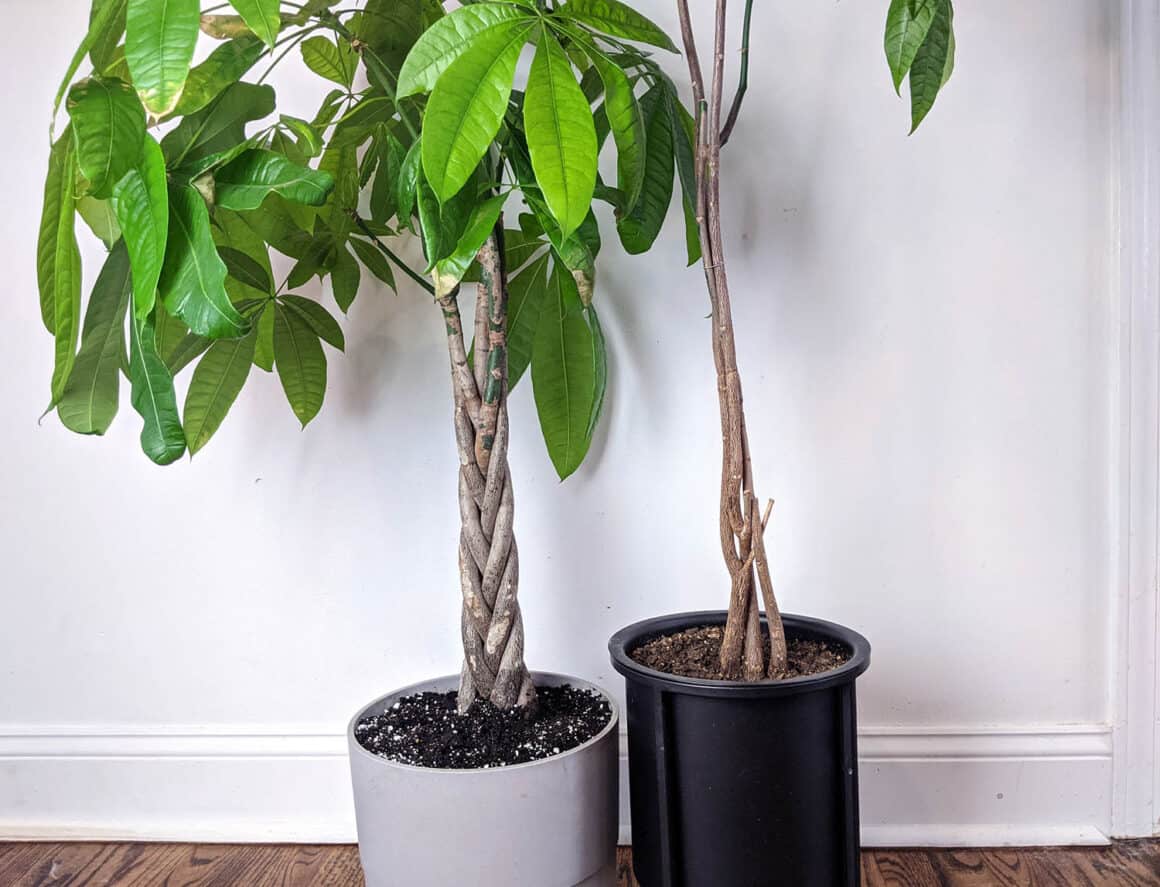
You will need to ensure that the money plant (aka Pachira Aquatica) is tall enough and flexible enough for braiding. Take two shoots at a time from the base and hold them there. Keep bringing them back to the center, much like you do with hair.
It is possible to tie the braids at the beginning to prevent them from coming apart. Continue weaving the stem parts that have been grown after 3-4 months. Below is a detailed description of the steps involved in braiding.
1. Ensure your plant is ready to be braided.
Before braiding the money tree plant, first, make sure it is ready for braiding. The plant must be 100% healthy and free from any pest infestations, diseases, or nutritional deficiencies.
You should have at least three to five shoots if you want your money tree braided well. You won’t have enough plants to work. Only young money trees can be braided. Because their shoots can be intertwined without having to snap in two, this is possible.
Use a measuring tape to measure the length of the shoots you wish to braid. They must be at least 14-16 inches in length.
This is important as prematurely weaving young shoots can have a negative effect on overall plant growth. The braids can cause scarring in young shoots. These scars will remain forever on the plant.
2. Ensure that your pot and soil are adequate.
A successful braided money plant will depend on the choice of the right pot. It must be large enough that it can hold three or more stems to braid. It does not have to be too big.
An oversized pot can end up storing excess water and eventually contributing to root rot. Clay terracotta pots are always better than plastic ones. It should have a drainage hole that is unclogged and of reasonable size.
Before you begin braiding, make sure to check the soil. Money plants should not be planted in soil that retains water. Instead, choose a succulent orchid mixture with perlite and peat. You should not allow water to accumulate in the soil for prolonged periods.
3. Extra stems can be removed.
Do you have any young stems on the lower branches that could interfere with your braiding? If so, they should be removed. Use your sharpest gardening shears to trim them at the point where the main shoots are protruding from the ground.
It is important to use disinfected and clean tools when pruning. Our favorite method to disinfect quickly is the alcohol rub. You can also order disinfectants at the store. To be safe, disinfect the tools before and after each use.
You can leave the new stems and offshoots on the top of the shoots unbroken. They actually help plants grow by providing food, support, and assistance.
4. Keep the shoots from the base.
Once you have completed your inspection of the plant, the pot, and the potting soil, it is time for braiding. Grab the shoots at the base.
Take only three shoots from your plant. Then take the two in one hand and the rest in the other.
The situation might be slightly different if you braid a money tree with five branches. Take two shoots in one hand, and hold the other two in the other. The middle shoot should be the one left.
5. Start braiding.
Now it is time to make a French braid using the shoots in each hand. Now, take the shoots from your left hand. Move them over the middle shoot so that the middle one is now to the left. Do the same with the sprouts in your right hand.
Your money tree braid should be loose. It is tempting to tie it too tight for fear of the braid opening. This is not recommended. As the plant grows, these shoots will become larger. When this happens, too-tight braiding can cause damage to the shoots.
Continue braiding from the base to the top of the plant. To untangle the stem and leaves at the top of your plant, it is best to get help.
6. Tie your braids up.
Continue braiding the shoots by following the steps in Step 5. Keep moving up from the bottom of the plant to the top. Stop braiding once you reach the point where money tree leaves begin to appear.
This point will be approximately two-thirds up the plant. To test if the braid is still strong, simply let go of the shoots with your hand.
It is fine if it remains braided. Otherwise, you can just leave it as is. If the braids become loose and separate, you need to tie them with a string. This can be done with a shoelace.
These should not be tied too tightly around braided shoots. Too tight ties can cause disfigurement and suffocation of the stems. They may even die if they are oxygen deficient.
7. Take your braided money trees.
Next, support the newly-braided tree with two stakes that are nearly the same height as the young ones. This will ensure that the money trees mature straight and vertically. You will see them leaning horribly to one side or the other.
Place the stakes in the soil 2 to 3 inches deep or as deep as you can so they don’t tip over.
Do not push them too far to cause damage to the roots. One stake should be placed on one side of the tree and the other on the opposite side. These stakes can be attached to the string used to tie braids.
8. Keep the plant braided and stowed for two to four months.
Your first braid should be left for two to four months before you can re-braid it. Take good care of your braided money tree. Make sure your tree receives the sunlight, water, and fertilization it needs.
Pest attacks should be avoided. Any new shoots that grow on braided sections should be trimmed. This is an essential step to maintain the overall appearance and look of the plant.
9. Re-braid the plant again.
It is not enough to braid this plant once. Because the plant has grown taller over time, it was braided. Remove any string, rope, or other users to attach the braid.
The braid will stay put, and the shoots won’t separate. You can now braid the shoots’ newly-grown parts by continuing to braid the old braid. Keep braiding the shoots until they reach the leafy part of the plant. At that point, you can stop.
This braid may not be necessary anymore. Only tie the sections that were newly braided if you have to. Also, remove the old stakes from the plant and replace them with new stakes that correspond with their new height. As mentioned, they can be used to support the plant.