
It is hard to find a home improvement project that makes a greater impact than replacing drafty windows. Single-pane double-hung windows are no longer feasible in times of high energy prices. New windows with triple or double panes can pay for themselves in a few years.
Window replacement can be done as a major home renovation project outsourced to a professional contractor. These projects can be expensive and often require a loan to finance. Insert DIYers can use replacement windows to save money. Inserts are a great way to update your whole house in years. You can replace three to four windows per year without breaking the bank.
Use a can of spray paint to transform old stuff.
Insert replacement windows are made with DIY installation in mind. With a little practice and preparation, it is possible to install them in hours.
Insert Replacement Windows vs New Construction Windows
There are two types of residential window units: insert replacement windows and new construction windows.
New construction windows come with nailing fins attached to the window’s perimeter. This allows the window to be nailed against the exterior of the house. These windows are ideal for new construction or large remodels with extensive exterior changes. However, some contractors will use them for replacement windows. New construction windows can be used for replacement projects. To attach the nailing fins, you will need to remove the exterior case moldings and some of the siding. This is usually a job best left to professionals. New construction windows are the best choice if a window opening needs to be enlarged. A good supply of new construction windows is usually available at home centers and builders’ houses.
No nailing fins are required for insert replacement windows. They can be fitted into existing frames after the old sashes have been removed. Insert replacement windows reduce construction time as they don’t require removal of siding or outer case moldings. Because they are easy to install and require minimal carpentry skills, insert replacements are excellent for DIYers. You can only retrofit replacement windows to an existing frame.
Insert windows can reduce the glass exposure slightly because they have an additional frame component. When you insert a window, the overall glass exposure of a window shrinks by about 2 to 3 inches. Insert windows are a great choice for DIYers due to their ease of installation and low cost. For professional replacements, it is not unusual to spend as high as $1,500 for a window, but a DIYer can install an insert window for as low as $250.
Although insert replacement windows are available in limited quantities at home improvement and building supply centers, you will need to measure your windows and custom-built them for your openings. This can take up to several weeks.
Sometimes professionals dismiss insert replacement windows as less durable and more weatherproof than new construction windows. However, homeowners find that insert windows can last for many years if properly installed.
Before You Begin
For replacing standard single-hung or double-hung windows that open vertically, insert replacement windows are the best choice. They are not the best choice if you’re replacing sliders or casement Windows that open horizontally. It is best to hire professionals to replace these types of windows.
There are many options for glazing and frame materials. You have many options for frame materials and glazing. There are many options for glass glazing, from single-pane glass suitable for mild climates to triple pane insulated glass with low E coatings and inert gases filling the gaps between the panes.
Before you buy insert windows, do your research. Many manufacturers choose from, so the warranty quality is often an indicator of the window’s durability. Read the instructions before installing; DIYers will appreciate an easy installation.
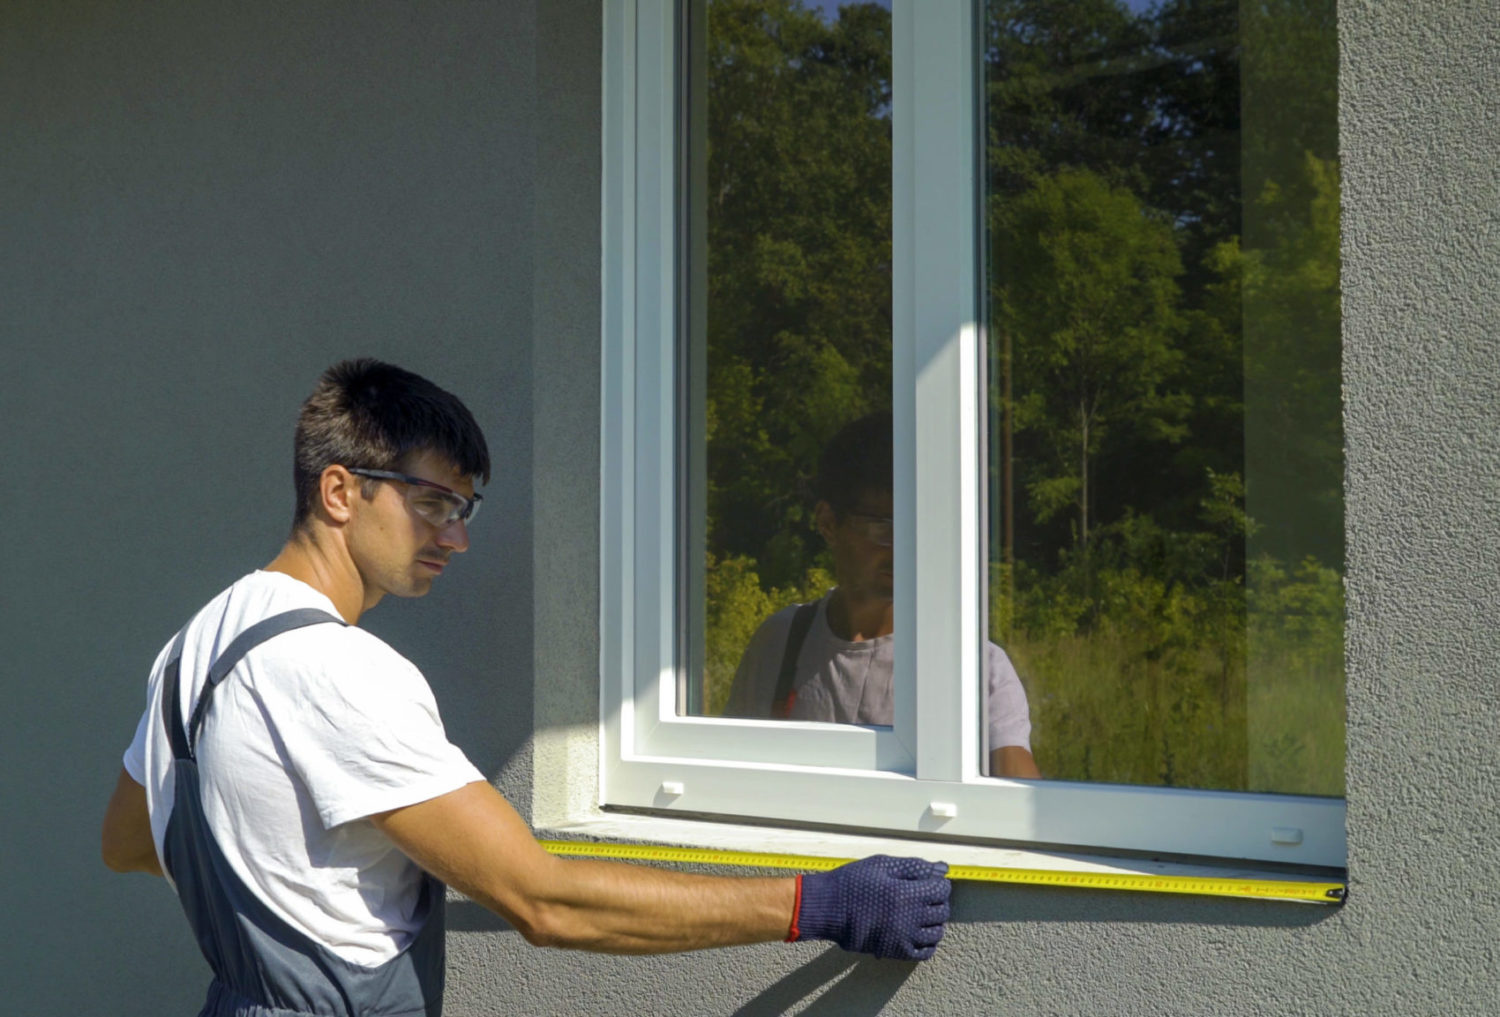
When buying replacement windows, it is important to measure properly. Replacement windows are made to fit tightly within existing window frames. Take measurements of your window frame opening according to manufacturer instructions, measuring in increments of 1/16 inches. The insert window unit should not be more than 1/8 inches shorter or narrower than the opening. This can be a problem in older homes, where the window frames might be slightly off-square. To ensure that you are buying the correct size, consult your local window specialist.
Vinyl-clad insert windows or vinyl-clad vinyl windows should match your trim color. If you don’t have the exact color, order windows that can be painted. Vinyl windows might not be paintable.
Safety considerations
If you want to replace an old double-hung windows, removing heavy pocket weights counterbalanced by the window sashes is necessary. These weights, often made from lead, should be disposed of safely. Do not throw lead weights in your household garbage. Many communities have established procedures for disposing hazardous materials like lead. This could involve you delivering lead weights to a drop-off center equipped to handle them.
Install insert replacement windows by using a high-quality silicone caulk. Replacement windows can fail due to moisture seepage.
What you’ll need
Equipment / Tools
- Flat pry bars
- Screwdriver
- Utility knife
- Screwgun
- Torpedo level
- Framing square
- Hammer
- Caulk gun
- If necessary, miter saw
- Brad nailer
- If needed, paintbrush
Materials
- Replace the window
- Silicone caulk in latex
- Shims
- If necessary, stop moldings
- If necessary, trim paint
Instructions
When installing replacement insert windows, you should expect to learn a lot. While you may spend several hours working on the first or second window, each one will take only a few minutes. It is important to have dry and warm weather. Also, it helps to begin early in the morning.
Although each manufacturer has its own installation procedures, the general process described here is consistent. Be sure to read the instructions provided by the manufacturer for measuring and sizing your new window.
Measure the window and order it
- Measure horizontally or vertically from one jamb to another jamb. When ordering a window, choose the smallest measurement. Instructions from the manufacturer will show you how to size your new window about your window opening. Most window units are slightly smaller than the opening to allow for easy installation.
- Consult a window specialist at your local home improvement center if you have any questions about size.
Take out the window stops
- To remove the window stop molding from the top and sides of the frame, use a hammer or a putty knife. Some moldings can be fixed with screws. You can remove the molding from the frame by using a utility knife if it has been painted.
- You may be able to reuse stop moldings if you take care of their removal after installing the insert window. If the stop moldings are brittle or old, purchasing and installing new mouldings may be easier.
Take out the Inner Sash
Remove the inner window frame sash from its opening. Also, remove the weight cords tied to the sides of each sash frame. Sometimes the sash cords can be nailed into the frames.
Eliminate the Parting Stops
Use a small screwdriver or a pry bar to remove the small parting stop moldings between the inner and outer windows sashes. They cannot be reused, so removing them from the frame is fine.
Take out the outer sash
The outer window should now be free from the frame. You can free it from the sash cords. Simply pull the knots out from their holes on the sides.
Take out the Counter Weights & Pulleys
- The heavy weights can be extracted by opening the weight pockets at the sides of your window frame. Use a utility knife to cut the sash cords. Then, remove the cords.
- The weight pulleys are located at the tops and sides of the window frame. The weights, cords and pulleys should be thrown away. Metal weights and pulleys are usually recyclable. Do not throw them away in your household garbage.
Insulate the Weight Pockets
- Fiberglass insulation loosely packed into the pockets will be sufficient to fill them. Insulating these pockets will significantly improve the energy efficiency of your windows.
- Screw the weight pockets back in place by replacing the covers.
The New Window is Ready to Go
After fitting the insert window, attach the header or expansion strip to the frame’s opening. Then you can loosely shim the window in place. Adjust the window to ensure it is square and level using a torpedo and a carpenter’s square.
Secure the Window
- Once you’re confident that the window will fit, take it out of the opening and seal the frame with caulk as per the instructions. Reinstall the window, then adjust it for level and plumb using a framing level and torpedo-level. To secure the window, use shims.
- For smooth sliding, make sure you test both sashes. If the sashes are too tight, you can use the adjustment screws in the side channels to adjust the operation. If that doesn’t solve the problem, you might need to remove the shims or use thinner shims.
- Once the window is properly fitted and the sashes are moving freely, you can drive the mounting screws into the window’s frame by pushing them through the side channels. Many insert windows come with predrilled holes for the screws. These screws should not be over tightened as they can cause the frame to become out of square.
- Reduce the length of the shims to fit flush with the frame.
Caulk the Joints
To eliminate any gaps, slide the header piece up at the top of your window. Then apply the recommended caulk on the joints both on the outside and inside the window. Follow the manufacturer’s instructions carefully. Some windows may require drainage to be left at the bottom sill.
Tip
You will need to paint the wood trim with a paintable caulk. Many latex caulks can be painted, but pure silicone caulks cannot.
Install the window stops
Use a brad nailer to attach the window stops around sides and tops of the new insert window. If you are using stop moldings that have been cut to size, use a miter saw to trim them and then paint or stain them before installing.
Caulk and Paint
Finish the installation by caulking around the stop moldings and then painting any final touches.